Wednesday, December 25, 2019

Cpanel Server Management, Cpanel Direct Admin Services

Looking for Server Management Specialists? Take a step ahead and try our services and Connect to our 24x7 Live chat to get technical assistance on your server related queries at https://hostechsupport.com or you can simply shoot an email to support@hostechsupport.com
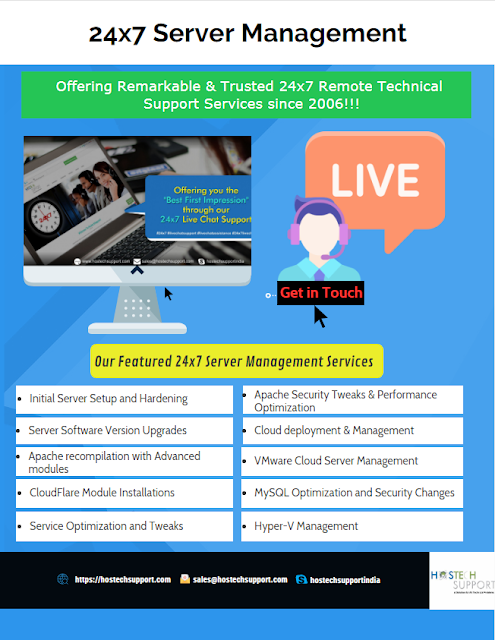
Our Linux/Server Management services include 24x7 Remote Technical Support, Server Administration, Server Management, Server hardening, 3rd party software installations, 24x7 Server Monitoring, Server migrations, Backup configurations and more.

Cpanel Server Management - Direct Admin Services:

  1. Initial Server installation & configuration management
  2. Let's Encrypt / SSL installation and configuration
  3. SMTP/POP/IMAP (Exim + Courier-IMAP/dovecot) server configure and optimization
  4. FTP Server setup (pure-ftpd / pro-ftpd).
  5. Google Apps Setup (DNS)
  6. Optimize and secure Apache (HTTP) server
  7. Software installations.
  8. Increase memory efficiency
  9. Hard disk performance tweaking
  10. MySQL database server optimization
  11. Backup Configuration and Audit Backup
  12. Secure SSH
  13. Anti-malware & anti-Virus installation
  14. Brute force detection Installation
  15. Control access to services by IP Address
  16. Monitor WHM server
  17. Secure Apache
  18. Mod Security Installation
  19. Kernel Patching.
  20. Schedule malware and virus scanning
  21. Restrict system’s compilers
  22. Install and configure csf a firewall
  23. Regular server updates
Find out more: https://www.hostechsupport.com or directly connect to our 24x7 Live chat support for our Support services.

Thursday, December 19, 2019

Need Server Administration Services for your Dedicated Servers ?

Get Linux Server Administration by Expert Techs! Web host, WHM, Cpanel, Nagios, Apache, Nginx, PHP, Ubuntu, WordPress, Drupal, Joomla And much more. Also, we manage, WebHost Manager(WHM) cPanel, Plesk, SolusVM, OpenVZ virtualization, & VestaCP. Experience of Server Load balancing, technology IP, IPV4 and IPV6. Also, considerable Hands-on experience in OpenVZ, Xen, VMWare Virtualizations, Linux VM (Debian), etc.

We manage the below services on your servers :

  • 1. Linux Server Installation & Configuration
  • 2. Any Linux Support Solutions
  • 3. Certified Linux Support Team
  • 4. Linux Server Performance Tuning
  • 5. High quality of Customer Satisfaction
  • 6. Monthly Server Reports
  • 7. Linux Server Backup Management
  • 8. 100% Uptime Servers
  • 9. Low Price Guarantee
  • 10. Best Outsourced Linux Support Services
  • 11. 24×7 Voice, Technical Support
  • 12. Installing software
  • 13. Upgrading software and applying patches
  • 14. Configuration changes
  • 15. Control Panel Upgrades
  • 16. Server Migration

Our Server administration services extend to all operating systems and applications, installation of 3rd party software, OS & application upgrades, initial server setup, diagnosis, security updates/patches, backup restoration in a timely manner. We have a 24x7 Remote Technical team and system engineers are part of our administration aims at granting clients with a stress-free environment. Clients can certainly come up with any case round the clock for everlasting 24x7 live chat or technical support.

For further queries and assistance, connect us on https://www.hostechsupport.com or you can email your issue on support@hostechsupport.com, we will revert you at our earliest.

Monday, October 14, 2019

Migrating Physical servers to Cloud


Basically, it is an approach described as decoupling and migrating a server’s operating system and data from a physical server to a virtual machine guest hosted on a virtualized platform (or the cloud). It is called as one of the best features of server virtualization is the ability to migrate physical server workloads to virtual servers. 

The physical to virtual migration choice allows you to remove aging servers, thus deducting the number of physical servers needed in a data center. Firstly, a physical server must be virtualized and then migrated into the cloud. Once you’ve virtualized, you will have to repeat the steps to migrate the server into a cloud.  The first step while starting with a physical-to-cloud migration is to identify the tools that you will use to execute your migration and the system you want to migrate. The key point here is that you don’t have to migrate twice  SaaS automatically virtualizes a physical server during the conversion process of migrating the physical server into the target cloud.

Thursday, August 22, 2019

Expert Cpanel Server Management Services | Direct Admin Server Management | Linux Cpanel Server Management | Linux cPanel Server Management

Expert Cpanel Server Management Services starting from $29/Mo 


Assistance with data migrations from Cpanel to Direct admin=== cPanel for Management ===DNS Server Management===Configure and manage the server resources including server backups, reseller account management===Managed Service Providers


 We Offer below Services:
  1. Linux Server Support
  2. Linux Server Management
  3. Cpanel Server Management
  4. 24x7 cPanel Server Management
  5. Monitor server Performance
  6. Server management in Linux
  7. Web hosting outsource support
  8. 24x7 Technical & Live Chat Assistance
  9. Expert cPanel Server Management Services
  10. Server Monitor Performance‎
  11. Cpanel server management
  12. Linux server administration
  13. Web server management
  14. 24x7 Server management services
  15. Web hosting outsource support
  16. Server Optimization
  17. Apache Server Monitoring/Optimization 


Saturday, August 17, 2019

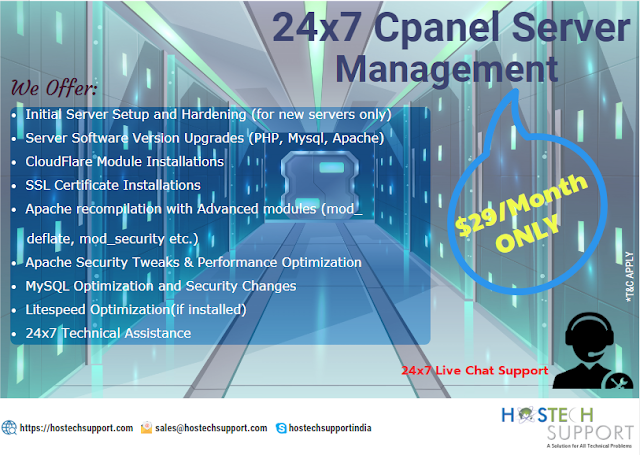
HostechSupport offers 24x7 Cpanel Server Management Services just at $29/ Month. 
*T&C Apply


Check out services inclusive:

1. Initial Server Setup and Hardening (for new servers only)
2. Server Software Version Upgrades (PHP, Mysql, Apache)
3. Cloudflare Module Installations
4. SSL Certificate Installations
5. Apache recompilation with Advanced modules (mod_deflate, mod_security, etc.)
6. Apache Security Tweaks & Performance Optimization
7. MySQL Optimization and Security Changes
8. Litespeed Optimization(if installed)
9. 24x7 Technical Assistance

Find out more for further queries and assistance: https://www.hostechsupport.com/per-server-management.php

24x7 Linux Server Management Company

Get 24x7 Cpanel Server Management, Server management services, Server Optimization
Linux server administration
24x7 Helpdesk and Live Chat Support 

Skype: hostechsupportindia

Need Server Administration for your Servers?

Get Linux Server Administration by Expert Techs! Web host, WHM, Cpanel, Nagios, Apache, Nginx, PHP, Ubuntu, WordPress, Drupal, Joomla And much more. Also, we manage, WebHost Manager(WHM) cPanel, Plesk, SolusVM, OpenVZ virtualization, & VestaCP. Experience of Server Load balancing, technology IP, IPV4 and IPV6. Also, considerable Hands-on experience in OpenVZ, Xen, VMWare Virtualizations, Linux VM (Debian), etc.


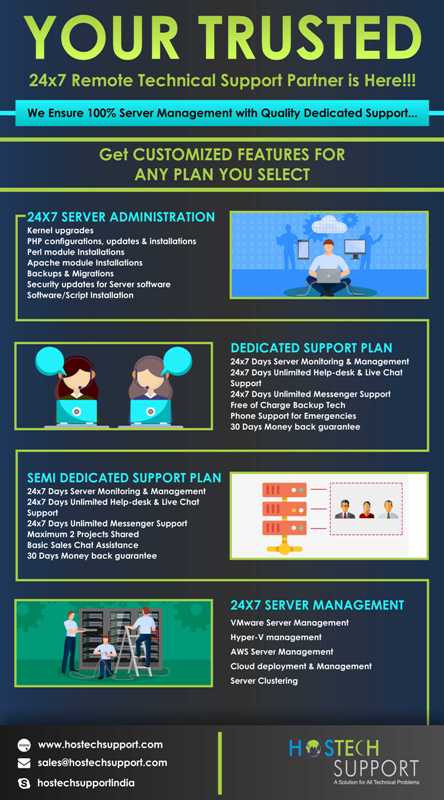
Plan Inclusive of below services: 
  • Kernel upgrades
  • PHP configurations, updates & installations with options like GD, Curl, etc.
  • Perl module Installations
  • Apache module Installations
  • Backups & Migrations
  • Security updates for Server software
  • Software/Script Installations
For further queries and assistance, stay connected: https://www.hostechsupport.com/remote-server-administration.php

24x7 Linux Server Management Company

Get 24x7 Cpanel Server Management, Server management services, Server Optimization
Linux server administration
24x7 Helpdesk and Live Chat Support 

Skype: hostechsupportindia

Wednesday, July 31, 2019

VMware Cloud Management


VMware Cloud Management


VMware delivers cloud technology framework and management, cloud application platform, and end-user computing solutions that can help to boost up your company’s conversion to cloud computing and facilitate your team to promptly recognize its value from this new approach. VMware vSphere works in concurrent with the VMware vShield family of products.
VMware solutions provide efficient, quick and self-service access to cogently simplify IT services provisioning and formation, so you can respond in a rapid pace to your business requirements. Meanwhile, it also allows putting policies in place that execute business and governance demands and needs, providing IT staff with the regulation it needs to minimize business and regulatory risk. 

VMware also guides the way in virtualization safety, so your policies are always applied to your virtual machines wherever they operate on a safe virtual container. This eradicates having to constantly reconfigure static security infrastructure for your dynamic computing environment. Virtualization is the requisite stimulant for enabling the evolution to cloud computing. VMware, the most rapidly accelerated growing enterprise software company and virtualization industry leader, develops virtualization to bring up cloud infrastructure and management solutions that undoubtedly lower down IT complication.
VMware delivers an extensive cloud management platform that can maintain hybrid (multi-cloud) technology and functioning anything from traditional to container (cloud native) workloads. VMware’s cloud management technology empowers a dynamic, compelling and consistent digital infrastructure to deliver the apps that power business innovation. A cloud framework connected with cloud management provides a common approach for developing and operating an organization grade hybrid cloud. Hybrid clouds based on VMware provide high levels of acuteness, competency, and control across both traditional and cloud-native, container-based applications. VMware-based clouds also grant IT organizations the ability to provide choice to their application development teams by supporting multiple models for requesting services and giving developers the freedom to use the tools of their choice. It also facilitates by providing the market-leading software that has enabled that to happen: vSphere for virtual infrastructure and vRealize suite for emerging towards a private cloud.

Friday, June 28, 2019

Need Virtual Assistance for your Clients??


Our Virtual Assistance support comprises of 24x7 helpdesk support, 24x7 Live & Sales chat, 24x7 Messenger Support. Email Support to renowned IT Companies, Web hosting Companies, Banking sector, Educational institutes, Healthcare organizations, e-Commerce portals, Job portals and Companies offering their own products & services. 

24x7 Server Management & Monitoring Services at Most Affordable rates...So Experience Matchless Technical & Customer Support Services for end-to-end IT Remote Services with the guaranteed response time and 24x7 Live Chat Assistance on your Technical Queries.

Get in touch with our 24x7 Expert Techs: https://www.hostechsupport.com/per-server-management.php

Monday, May 27, 2019

Tuesday, May 14, 2019

How to Backup Data using Backup Manager in Plesk 12 (Windows)?

Steps to Backup data using Backup Manager in Plesk 12 (Window):

1. Login to the Plesk control panel


2. ​On the left-hand side menu bar, under Server Management select Tools & Settings


3. On the next page, select Backup Manager from the Tools & Resources section.

4. On the Backup Manager Page, select where you would like to store your backup by selecting the relevant tab.

5. Server Repository - This will back up to the server that Plesk is currently running on.Personal FTP Repository - This option will store the backup to any FTP space you have the credentials for.


6. Now on the same page as Backup Manager click on the Backup icon 


7. Add a name for the backup that you can easily remember in the Add prefix to backup name box. Add notes in the comments box as per your requirements

8. For the next step, scroll down a bit and enter the following information: Create multivolume backup - Unchecked. Store backup in - Unless you have a personal FTP repository set up, select Server repository.Email Notifications - Enter your e-mail address.

Thursday, May 9, 2019

Get Elegant Logo Designs for your Business TODAY!!!


Get in touch: https://hostechsupport.com
Email: hostechs@gmail.com 

Monday, May 6, 2019

How to generate and Download the Full backup of the website in cPanel?

A full backup is a backup of all of your files, e-mail, databases, etc. To run a full backup, you cannot download the full backup right away. The backup takes a time to perform and the server will send you an email once the backup is ready.

How to Create MySQL database in cPanel?

  1. Login to Cpanel.
  1. Click the MySQL Databases icon.
  1. In the box to the right of New Database, please provide a name for the database. Please note cPanel will create the full name of the database as cPaneluser_databasename.
  1. Click the Create Database button.

How to change file permissions in the File manager of cPanel?

One of the easy and basic ways to change the permissions is through File Manager in cPanel. To change the permissions for a file or folder in cPanel, please do the following:

1. Click File Manager
2. Click the name of the file for which you would like to change the permissions
3. Select the Change Permissions link at the top right of the page
4. Select the permissions you would like to set for the file
5. Click Change Permissions

We Design Your Brand!!!


We create Elegant Professional Designs for your Brand...


Our Services:

1. Logo
2. Banner
3. Flyers
4. Brochures
5. Newsletters
6. Business cards
7. Static Websites
Connect & Get in touch with your Graphic Design requirement.

Friday, May 3, 2019

How to Backup & Restore MySQL Database in cPanel.

  To backup the databases please do the following:
  1. Login to your control panel and click Backups.
  2. Under Download a MySQL Database Backup, click the name of the database.
  3. Click Save As.
  4. Select a destination for where you would like the back up to be saved, locally.
Once you have a backup, if you ever inadvertently lose your data, then you can restore the database easily and quickly.
To restore a database, please do the following:
  1.  Login to your control panel and click Backups.
  2.  Click the Browse button next to the option which says Restore a MySQL Database.
  3. Select the .sql.gz file which you want to be restored.
  4. Click the Open button and click the Upload button.

Your database driven website should be working again.

How to Fix "Internal Server Error 500"

The most common reasons for 500 errors:

1) Bad permissions, Writable by group
Directories and folders should be 755. Executable scripts within the cgi-bin folder must be 755. Images, media, and text files like HTML should be 644.

2) Bad .htaccess, Invalid command
In the (dot) htaccess file, you may have added lines that are either worded badly or conflicting. The best way to troubleshoot this is the comment out the lines in the htaccess.
You can comment out a line in the .htaccess by adding # to the beginning. You are wise to save an original copy of any file before you make changes.
For example, if the .htaccess looks like
Directory Index default.html
Add Type application/x-httpd-php5 PHP
Then try something like this
Directory Index default.html
#Add Type application/x-httpd-php5 PHP
Broken lines and lines that start with php_flag are the most common mistakes. If you cannot determine which line is the problem, then comment out every line.

3) Exceeding resources, nothing in the Error Log
It is possible your 500 error is caused by too many processes in the server queue.
With SSH (shell) access, you can view the processes running on your account. Simply type this command:
Ps faux
Or type this to view a specific user's account (be sure to replace username with the actual username):
ps faux |grep username
Once you have the process ID ("pid"), type this to kill the specific process (be sure to replace pidwith the actual process ID):

Kill -9 pid

How to Create a Cron Job in cPanel?

  1. Click on the "Cron Jobs" icon inside cPanel, under Advanced.
  2. Make sure the current email address is valid. If not, enter a new email and click the "Update Email" button.
  3. Select the Common Setting you want. This will automatically change the other time settings.
  4. Alternatively, you may adjust the individual time settings. Minute, Hour, Day, Month and Weekday can be modified to achieve your goal.
  5. In the input box to the right of "Command", type the name of the file type, then add a space and provide the path to the file which you would like the command to run.
  6. Click the "Add New Cron Job" button.

How can I use remote mail servers for my mails in CPanel

a) Make beyond any doubt that you have every one of the subtle elements of your mail servers such mail servers hostname, IPs and so forth.
b) Login to CPanel of your site
c) Now scan for MX passage choice under Mail menu in your CPanel and tap on it

d) In the following interface look down. To start with, evacuate any present MX records that are set up

e) Then under the "Include New Record" segment, enter 1 as the "Need," enter your remote mail servers hostname as the "Goal," and after that snap "Include New Record."

f) After you have included the greater part of your MX records, select "Consequently Detect Configuration" under the "Email Routing" segment, and after that snap "Change."


g) Now you have sit tight for the DNS proliferation for these new MX records , it might take upto 24 hrs to refresh the DNS

How to Install Zend Optimizer with cPanel.

Zend Optimizer is a PHP addon which offers storing to enhance speed when stacking destinations; it can build execution by up to 40% by reserving as often as possible saw segments of PHP pages. Zend Guard likewise is helpful for encoding PHP documents to secure source code.

Here's the manner by which to introduce Zend Optimizer:

1.    Login to your server by means of SSH
2.    Run:/scripts/installzendopt

3.    Take after the directions on the screen to introduce Zend Optimizer

Install Antivirus (Clamav) on a cPanel

eAccelerator is a PHP quickening agent and streamlining agent. It enhances execution by re-utilizing assembled PHP scripts and streamlining them to accelerate their execution.

With a specific end goal to have it introduced you will require a committed server condition since it requires worldwide server changes. In cPanel its establishment is simple and quick after these two stages:

1. Ensure PHP keeps running as DSO Apache module. For this reason, sign into your cPanel server WHM and go to 'Design PHP and SuExec'. There ensure that the PHP 5 Handler is set to dso. 2. Next, sign in as root by ssh and issue the accompanying summon:
/scripts/phpextensionmgr install EAccelerator

With the above basic and simple strides, your PHP (site all in all) execution ought to be impressively enhanced with the assistance of eAccelerator.

How to Add multiple IPs to the server with WHM

1. Login to cPanel Webhost Manager (WHM) on the server.

2. On the left side board, explore the IP Functions menu, and afterward, tap on Add a New IP Address interface.

3. Enter the IP address in the IP(s) to include field. In spite of the fact that the connection says An IP Address, you can without much of a stretch present various or more than one IP delivers to the server on the double. For more than 1 IP address, indicate in Class C CIDR arrange or 192.168.0.1-254 organization. For instance, 192.168.4.128/25, 192.168.3.5-10, 192.168.99.55-230.

4. Adjust the subnet cover default estimation of 255.255.255.0 to the legitimate an incentive for the IP address(s) in the Subnet Mask field, if required. Typically this esteem will be given by your facilitating supplier.


5. Tap on Submit catch

How to Assign Dedicated IPs to the Website in WHM

1. Sign in to your WHM 

2. Under the IP Functions select the Change Site's IP Address 

3. Presently pick the record or site to which you need to allocate a devoted IP and the IP you will give

4. Spare the progressions

How to set up Private name servers in WHM

1. Sign in to your server's WHM interface and discover the route area on the left called Basic cPanel and WHM Setup, under Server Configuration. This is the primary thing on the left route bar.

2. When you stack this screen interestingly you may see that two nameservers, utilizing a similar space name as the server's hostname, are as of now set up. Supplant those name servers with your coveted name servers and include the IP.


3. Tap on Assign IP address and Add an A section for Each name servers .Presently you are prepared to enlist your name servers at your site recorder end.

Steps to Disable Default cPanel Login Details For FTP Access

1.    Open up the FTP update file and edit it using the following command:
root@server [] vi /usr/local/cpanel/bin/ftpupdate
2. Move to the line number 189 or 211 and comment those. If you are using some of the old cPanel version, then you should get the following necessary code at line number 189 and if your cPanel version is the upgraded version then you can get
You can see the following contents after editing the above file:
$entry->[3], $entry->[6], $entry->[7], $entry->[8] ) . "\n";
$vhosts->{$system_user} = join( ':', $system_user, $entry->[1], $entry->[2], $entry->[3], $entry->[6], $entry->[7], $entry->[8] ) . "\n";

  1. After the changes are done, make sure you run following command:

root@server [] /usr/local/cpanel/bin/ftpupdate

You will be  secured from the hack attempts

Steps to resolve "Webmail Shows Internal Server Error: User is Over Quota."

Please refer the following steps:

  1. root@server[#] cd /var/cpanel/overquota
  2. root@server [/var/cpanel/overquota]# mv username username-bak

Make sure you replace the username with the actual cPanel username.

You won't see any error message after performing above steps.

How to install LAMP on Ubuntu16.04

  1. Update your system (Login with SSH on your server)

Before we start, let’s make sure your system is up-to-date by running the following command:


#apt-get update && apt-get upgrade


Always keep your system updated. You can also set up automatic updates.

  1. Installing Apache

We will start with installing the Apache web server. Apache is considered as the most widely used web server software. It is fast, secure, reliable and can be easily customized depending on your needs.

To install Apache on your server, run the following command:


#apt-get install apache2


After the installation is complete, you should enable Apache to start automatically upon system boot. You can do that with the following command:

#systemctl enable apache2

To verify that Apache is running, open your web browser and enter your server IP address, (e.g. http://111.222.333.444). If Apache is successfully installed you should see a message saying “It works!”.

  1. Installing MySQL

Next, we will install MySQL on your server. MySQL is one of the most popular database management systems.

To install MySQL on your system, type the following command and enter Y to continue:


#apt-get install mysql-server


During the installation, you will be asked to enter a password for the MySQL root user. Make sure you enter a strong password.

After the installation is complete, in order to improve the security of your MySQL server, we recommend doing the MySQL secure installation by typing the following command:


#mysql_secure_installation


First, you will be asked about setting up the validate password plugin.

Would you like to setup VALIDATE PASSWORD plugin?(Press y|Y for Yes, any other key for No) :

This plugin checks the strength of a password and allows the users to set only passwords which are secure enough.

Whether to enable this or not is entirely up to you, but it’s always recommended to use strong passwords.

If you choose ‘yes’, you will be asked to choose the level of the password validation policy:

There are three levels of password validation policy:

LOW Length >= 8
MEDIUM Length >= 8, numeric, mixed case, and special characters
STRONG Length >= 8, numeric, mixed case, special characters and dictionary file

Please enter 0 = LOW, 1 = MEDIUM and 2 = STRONG:

Next, you will be asked to change the root password, but since we already created it during the MySQL installation, we can skip this step by pressing Enter.

After this, you will get asked a couple of more questions and it is recommended that you answer ‘yes’ to all of them:

Remove anonymous users? (Press y|Y for Yes, any other key for No) :

Disallow root login remotely? (Press y|Y for Yes, any other key for No) :

Remove test database and access to it? (Press y|Y for Yes, any other key for No) :

Reload privilege tables now? (Press y|Y for Yes, any other key for No) :

Again, we can enable MySQL to start on boot with the following command:


#systemctl enable mysql

With this, your MySQL installation is now complete.

  1. Installing PHP

The last step in this tutorial is to install PHP. PHP is a programming language mostly used for developing dynamic websites.

We will also include some additional modules, in order to help PHP to connect to our Apache and MySQL.

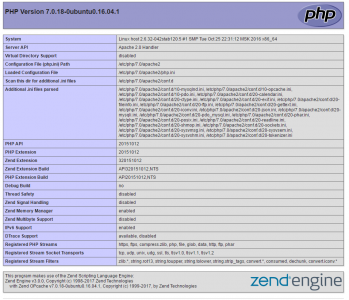
Now, if you navigate to this page: http://your_server_ip_address/info.php in your web browser, you will see the following page showing your current PHP configuration: